You can find all sorts of egg-shaped plastic toys and candy boxes in stores around Easter. Many of these can be used as molds to make jelly eggs for this dessert.
If you can’t find a whole egg for a mold, half egg shapes can also be used to create a similar effect.


Make a tiny hole on the top of the mold and fill the mold with a cream color base. Place the egg in an upright position and leave the egg in the fridge to set.
You can find the color base recipe here.
If you wish to place flowers above the eggs in the dessert, prepare a batch of clear jelly a day in advance. You can find the recipe for the clear jelly here.
Draw flowers in smaller containers first. Use the same color base recipe you have used to fill the eggs.


You can find detailed instructions about drawing different flowers in lesson three of our online class.
You can also pour the jelly into the large container and draw flowers directly into it, after it has set, but it might be challenging to access different angles to draw petals properly if you are using a deep container.
Prepare more clear jelly and pour a little bit of it into the large container. Use only a thin layer to prevent the flowers from floating out of place. Place the flowers in the liquid jelly and place the container in the fridge to set.

When the flowers have set in place, add another layer of the jelly if you want the flowers to appear above the eggs, or start arranging the eggs right away if you want them to be placed between flowers.
Arrange the whole eggs first and seal them with liquid jelly in layers. Jelly should be around room temperature. Warm jelly will melt the eggs.


Place the dessert in the fridge after each layer. Finish the dessert with egg halves and seal with a final layer of liquid gelatin or mousse.
Leave the dessert in the fridge to set for a few hours.
To take the dessert out of the plastic container, run a toothpick or knife around the dessert edge to release it from the container and then place the container into warm water. When the dessert has detached from the container, turn it upside down over a serving platter. Keep it refrigerated until serving.

To find out more about creating gelatin art desserts, we recommend that you take a look at our video instructions and our free online class on YouTube.
You can see the process of creating this dessert here:
To learn more about Gelatin Art, visit our instructions page here.
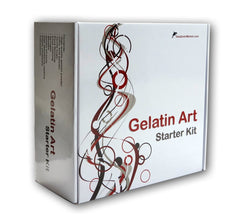
To purchase high quality gelatin or our easy-to-use starter kit for beginners, visit our online store.
