 To make an impressive gelatin art cake using only one flower, you can use the technique described below.
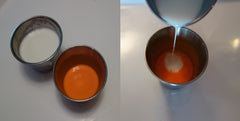
Fill a large container with clear gelatin and let it set in the fridge overnight. Depending on the size of the container, you may need to multiply the recipe 3 or 4 times. Leave some space on the top of the container for another layer.
When the clear base has set, draw a larger flower in the center using a gelatin color base.
The color base should be neither too thick nor too runny. Immerse the container with the color base into warm water occasionally to keep the consistency of the base at the right level.

(For basic information on how to make gelatin art flowers visit our instructions page here.)
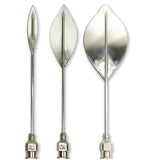
Separate a small amount of the color base and add a few drops of color. Take your smallest tool or needle and make several tiny petals in the center of the cake.
As you move away from the center, add more and more white color base to dilute the color and change the flower shade gradually. Switch to larger tools as you progress.
Make a fairly wide flower as there won't be anything else to fill the top of the cake.
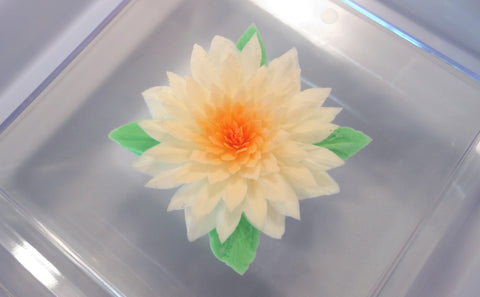
Finish off with several large leaves at the bottom of the flower.
Clean the cake surface with a wet napkin to ensure there are no smudges left on the gelatin surface.
Prepare another serving of the clear gelatin base and add the desired food coloring. (If you want it to set quickly, double the amount of gelatin used.) Add only a few drops of color at the time and stir until you have accomplished the desired shade.
When the colored gelatin has cooled down a bit, pour it over your cake and let it set in the fridge for several hours.
When the colored gelatin has set, cover it with a layer of mousse or cream based color base.
Depending on the size of your container, you may need to double or triple the recipe.
Leave the cake in the fridge for several hours.
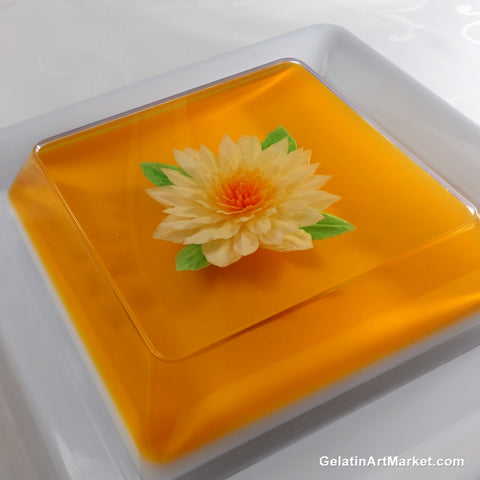
To take the cake out of the container, immerse it in warm water until the gelatin has melted slightly around the edge. Once you can feel the cake moving gently in the container, turn it upside down onto a serving platter. Keep the cake above the kitchen sink to prevent liquid gelatin from dripping onto your counter top.
You may want to practice taking smaller gelatin desserts out of the container before you take on a larger cake like this. When in doubt, leave it in the water a little bit longer. It is better to have more of the edges melted than to cause the cake to tear if it's still stuck to the container.

Decorate the cake slices with whipping cream, candied fruit, chocolate drizzle or anything else sweet you have handy.
All gelatin art recipes can be found on our recipes page.
To order gelatin art supplies or an easy-to-use gelatin art starter kit, visit our online store here.
