Here is an easy technique you can use to make a fun cake for a children's party.
Before you begin, place your container onto a piece of paper and draw a circle around it.
Remove the container and draw lines where the cake will be cut. This template will help you space the shapes evenly and ensure every kid gets a slice with a whole worm in it.


You can make approximately 8 to 12 slices in a 10 inch container.
Fill the container with fruit flavored jelly and let it set in the fridge for a few hours or overnight.

You can find the recipe for the jelly here. Use high quality gelatin for best results.
Use any flavor you like to make the jelly:

When the jelly has set, use gelatin melting tools to melt rows of small indentations. Start close to the container center to prevent the worm head from ending up too close to the container edge. Make 4-5 small holes, increasing the size with each one. Make the last hole significantly larger than the rest of them.

The simplest way to make eyes and other facial features on these melted shapes is to draw them with food coloring or with the same mixture used to fill the shape.
The recipe for the filling can be found here.
If you want to make eyes that can be placed onto the jelly, as seen in the video, make a thicker color base and dry it in droplets on parchment paper. You can use black cocoa to accomplish a darker shade.
Fill the worms with different colors and let them set in the fridge.

If you feel adventurous, you can create a flower in the middle of the cake.
You can find examples of many different flowers that can be drawn in jelly on our web site. Use the same filling you have filled the worms with to draw the flower.

To learn more about drawing flowers in jelly, you can see our free online tutorial here.
To finish the jelly, pour a colorful background onto it. You can use either the clear jelly recipe or the cream color base recipe for the background. Pick a color that is different from the worm colors to make the worm shapes stand out.


You can also use fruit juice or cocoa jellies for the cake background.
At this point you can serve the jelly as it is, create mousse layers beneath it or place it on top of a cake.
A simple mousse recipe can be found here.
This video show the process of creating the worm cake:
Worms are not the only shapes that look good in jelly. You can also create snakes, lizards, mushrooms, mice, snails, slugs and other shapes.
To learn more about Gelatin Art, visit our instructions page here.
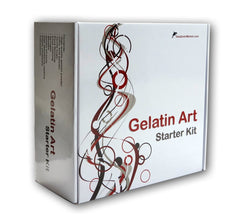
To purchase high quality gelatin or our easy-to-use starter kit for beginners, visit our online store.
