Autumn is here again with all of it's gorgeous colors. What a wonderful opportunity to capture it's beauty in a delicious gelatin art cake.
This article shows how to make leaves using a gelatin color base. To learn the basics of gelatin art, please see our free online class here.
Start the cake by drawing a few flowers in the foreground. Light colors such as white, cream, beige or yellow work best for this application.
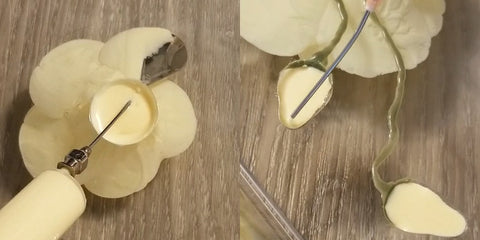
When the flowers are finished. Prepare a large number of leaves to cover the bottom of the cake.
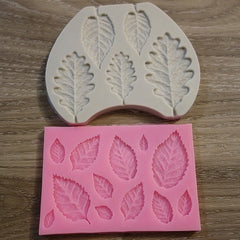
You will need a leaf shaped mold to create the leaves. The best molds to use with gelatin are silicone fondant molds, but plastic and metal chocolate molds can work well too as long as they are smooth and release the shape easily.

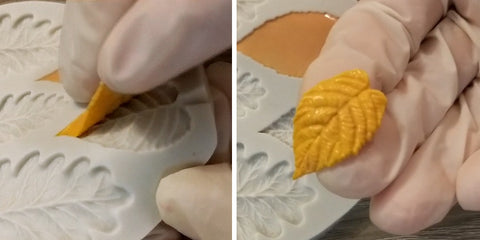
Fill the mold with a gelatin color base. You can make a simple white color base and use food coloring to make different shades or you can use caramel and cocoa to color your leaves.
You can find the color base recipes here:
To make a caramel color base, use the white color base recipe, but replace 2/3 cup of cream with 2/3 cup of (home-made or store-bought) caramel sauce.
Mix the three color bases to achieve different shades of brown.

If you only have one mold, keep the color base in the fridge and warm up only a few teaspoons at a time. Place the color base into a small container and lower it into warm tap water. In a few seconds, the color base will start to melt and you will be able to start filling the mold.
Place the mold in the fridge and let the shape solidify. In about 10-15 minutes, you should be able to take the leaves out.
Place the leaves onto plastic cling wrap and put them back in the fridge. You can place multiple layers of leaves on top of each other as long as they are separated by cling wrap.
If you will be working on the cake over multiple days, keep the leaves in an air tight container to prevent them from drying up.
When you have enough leaves to cover the bottom, warm up some clear gelatin (or make a new batch) and pour it over the cake.

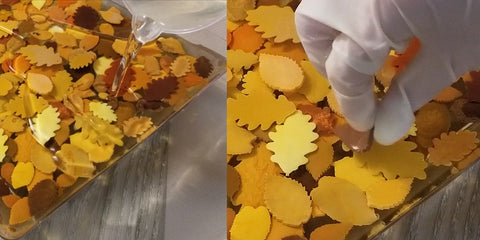
Release all air bubbles from the gelatin surface and start placing leaves in a random pattern.
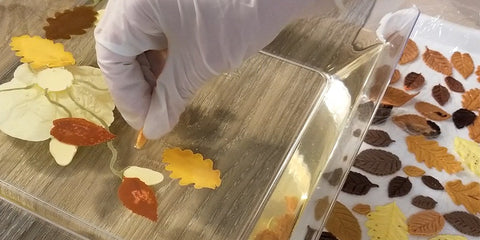
Have all leaves ready in advance and work fast. Liquid gelatin will solidify quickly.
When the first layer of leaves solidifies, you can add additional layers to create an interesting 3D effect.
When the last layer is done, leave the cake in the fridge for a few hours.
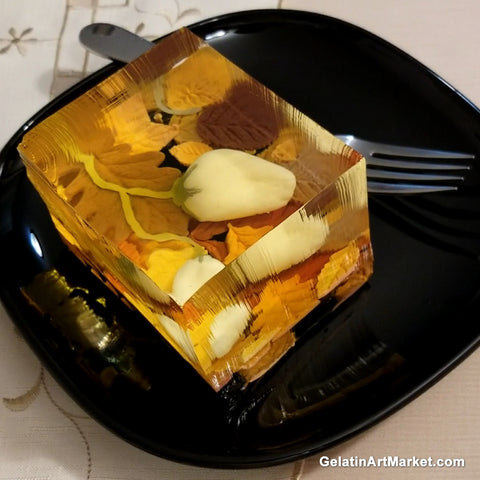
To take the cake out of the container, lower it into warm water for a few seconds. When the gelatin has detached from the container, turn the cake upside down onto a serving tray. Scoop up the excess liquid gelatin from the tray and the cake is ready to be served.
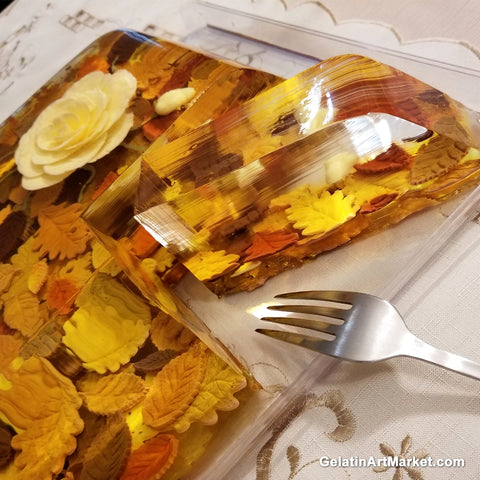
Enjoy the rich flavors of apple, cream, coca and caramel in every slice.
This video shows the process of creating this cake:
To learn more about Gelatin Art, visit our instructions page here.
To purchase high quality gelatin or our easy-to-use starter kit for beginners, visit our online store.