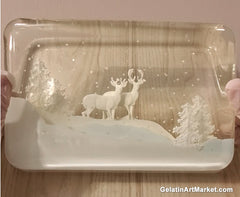
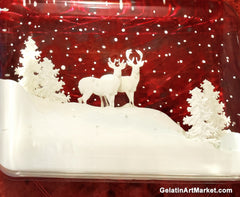
This winter scene jelly is made by pouring several separate layers of gelatin.
White "snowflake" dots, hills, trees and other shapes are added to each layer to create a 3D effect. When the dessert is tilted slowly upwards, white dots will create an illusion of snowflakes falling softly at different speeds.
Molds:
You can use any chocolate of fondant mold for this purpose. There is a wide variety of silicone molds available on the internet marketplace and most of them are fairly inexpensive.

Use your imagination and pick the shapes that will create your unique design.
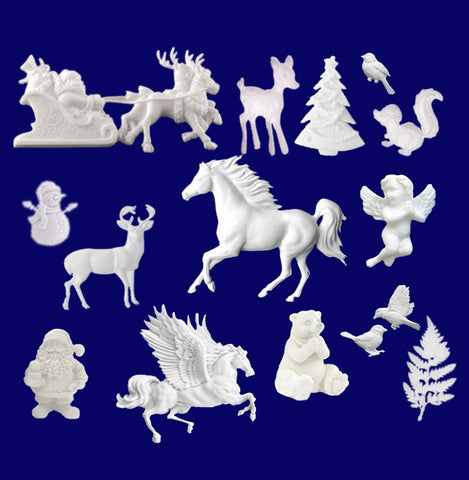
Christmas trees, animals, snowmen and Santa Claus work well for winter desserts, but you can also pick shapes that can be re-used for multiple occasions.
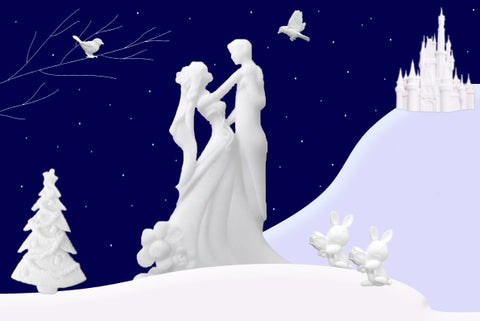
For example, shapes from this fairy tale winter scene composition can be re-purposed for an engagement, wedding, Easter or spring dessert as well.
When buying a mold, always check the mold size. Enlarged images on web sites make the items appear larger than they actually are. Check the description of the mold to ensure the size will fit your design.
Zoom in and see if the mold is smooth. Some low-quality molds can have rough edges that make the finished shape look unpolished. If the price is very low, you may be looking at a hastily produced mold. Examine the mold pictures carefully before you buy.

Process:
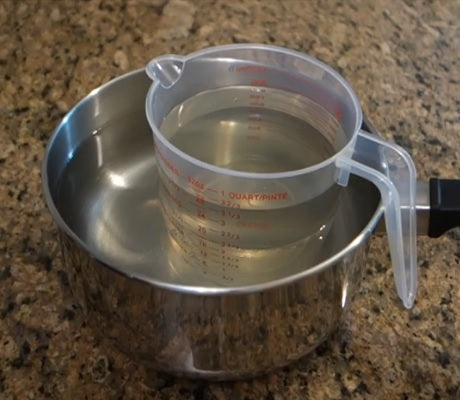
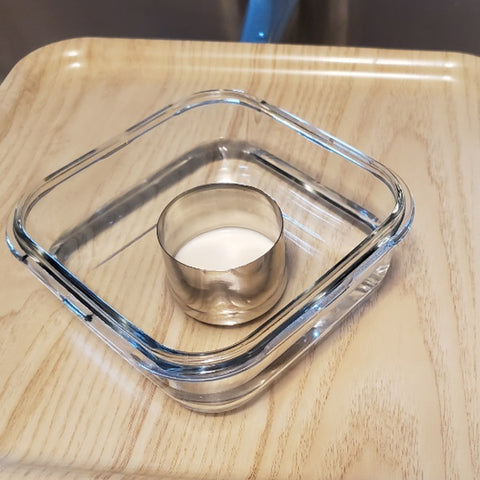
Start by measuring the capacity of your container. You can use a glass casserole dish or a larger plastic container to make this dessert. Fill the container with water and then pour the water into a measuring cup. This will give you an idea how much clear gelatin you should prepare.
You should always use high quality gelatin powder that has high clarity and low odor. Gelatin is prepared with sugar and fruit flavoring to create a pleasantly refreshing flavor. You can find the recipe for clear gelatin here or watch a step-by-step video here.
When the gelatin base is prepared, pour a little bit of it onto the container bottom and leave it in the fridge while you prepare the rest of the ingredients.

Put the remainder of the gelatin into a dish and lower it into warm water to keep it liquid. You may need to replace the warm water a few times to keep the temperature up while you work.
To create the white hills and shapes, you will need gelatin, milk, cream and sugar. You can find the recipe for the white color base here or follow the step-by-step video here.
If you want to make the white color base brighter, you can add white food coloring and mix it well with a mixer or stick blender.
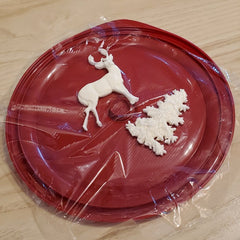
When the color base is ready, fill the silicone mold with a syringe.
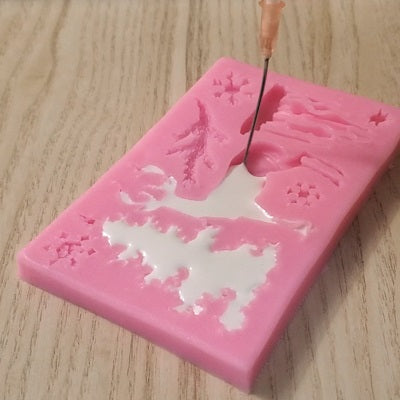
Lifting a flexible mold filled with liquid may be challenging. Place the mold onto a plate or a tray before filling it up. Once the mold is filled, leave it in the fridge to set.
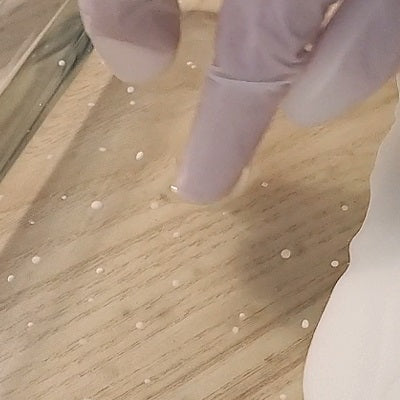
When the first layer of gelatin has hardened enough to hold it's shape, take it out of the fridge and draw a few dots on the surface.

You can touch the surface gently to check the firmness, but be careful no to tear it. If the gelatin surface is not sticking to your fingers, you can start drawing snowflakes.
If the color base has thickened up, place it in a small container and put it into warm water for a few seconds to warm it up.
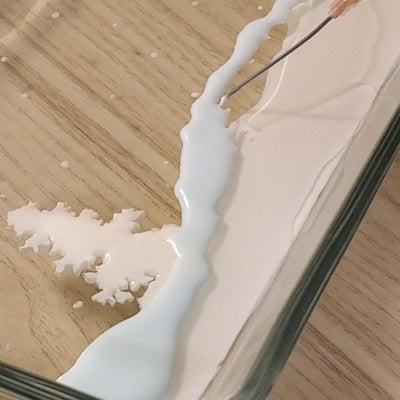
To draw a snow covered ground on the bottom of the dish, create a thin outline first. Since the gelatin layer is cold, the line will solidify quickly.

Fill in the rest of the space the same way.
Place the dessert back in the fridge for a few minutes while you prepare the next step.
To pour the next layer of liquid gelatin, it will need to be slightly above room temperature, but not hot enough to melt the snowflakes. Warm it up or cool it down as needed.
Add more liquid gelatin into the container with a ladle.
When you pour a new layer of gelatin onto the old one, some air bubbles may form on the old layer surface.

Quickly, release the air bubbles with your fingers before the new layer has thickened up. Move your fingers between the snowflakes, be careful not to scrape them off.
Place the container back into the fridge to set.
While you wait for the new layer to set. Check whether the shape in the mold has hardened enough to take it out.
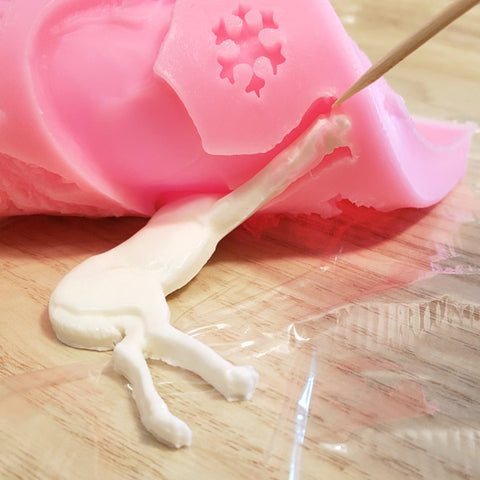
Release the shape edges from the mold. Follow the shape outline and make sure all edges have been detached from the mold.

Use plastic cling-wrap to handle the shape. The shape will be fragile and may stick to other surfaces. Cling wrap will prevent it from sticking to your fingers and the plate you place it on.
Place the mold onto cling wrap and bend it slowly to allow the shape to come out. Use a toothpick to help it come out intact.
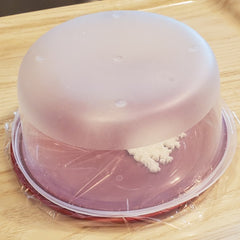
You can create all shapes in advance. Place the cling wrap onto an air tight container lid, close it and place it in the fridge. Multiple layers can be stored in the same container as long as there is cling wrap between them.
When you are ready to proceed to the next layer, warm up a bit of color base in warm water.
Draw a few snowflakes first.
Take all shapes you plan to use in this layer out and keep them near by. When you pour a new layer of gelatin onto the cold surface of the dessert, it will solidify quickly, having all shapes ready to go will allow you to work fast.
Pour some liquid gelatin into the container and quickly release any air bubbles that form on the surface.
Place the desired shapes and allow them to set for a few minutes. If you move the container too soon, the shapes may shift out of place. Once they are no longer floating freely, place the container back into the fridge.

If you will be creating multiple hills on the bottom, you can make some of them a bit darker to make them more visible.
Continue adding layers until the container is almost full.
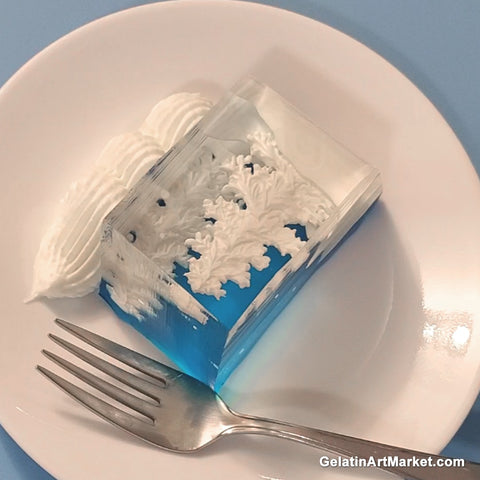
When you are done with the transparent layers, you can serve the cake as it is. You can use a colorful tray to make the white shapes pop.
You can also add some food color to the last layer to complete your design. This way, the color of your dessert will remain strong regardless of the color of the platter.

If you don't like to use food coloring, you can use fruit juice to complete your design. The juice will add not only color but also additional flavor to your dessert. You can find the fruit juice jelly recipe here.
To take the dessert out of the container, run a toothpick or a knife tip alongside the dessert edge to release it from the container. Place the container into warm tap water for a while.
Thick glass containers may take a few minutes to warm up. Plastic containers will warm up faster.
When the dessert is no longer attached to the container, place a serving platter onto the container, and flip them both over.
Make sure you hold both of them firmly. Gelatin desserts can be quite heavy and slippery!
You may also want to make the dessert bottom wet with water before you turn the dessert over. This way, it will not stick to the platter and you will be able to move it into place if it is not centered on the platter.
It is best to keep the dessert above the kitchen sink while you are taking it out. There will be some liquid gelatin around the dessert. Let is drain into the sink and wash all leaks and spills with plenty of warm water. Gelatin looks like clear water but it becomes sticky as it dries.
Serve the dessert slices with some whipped cream and enjoy!
This video shows the process of creating this cake:
Add a red background and layers of mousse to create a beautiful holiday cake:
To learn more about Gelatin Art, visit our instructions page here.
To purchase high quality gelatin or our easy-to-use starter kit for beginners, visit our online store.